


How to Set Up Quick Heal Parental Control Feature?
Having a hard time setting up the Quick Heal Parental Control feature? Here’s an easy step-by-step guide to help you out.
What is Parental Control and Why is it Important?
In today’s digital era, where Internet rules the roost, Parental Control can only be referred to as the need of the hour for every parent. With good parenting skills combined with a powerful parent control feature, parents can be their kids’ protective armor in the online world. This post elaborates on the benefits of parental control for both kids and their parents. The following guide tells you how to set up Quick Heal Parental Control.
After you click the Quick Heal icon on your computer, you are taken to the Quick Heal dashboard, as shown below:
(Click on the images for a magnified view.)
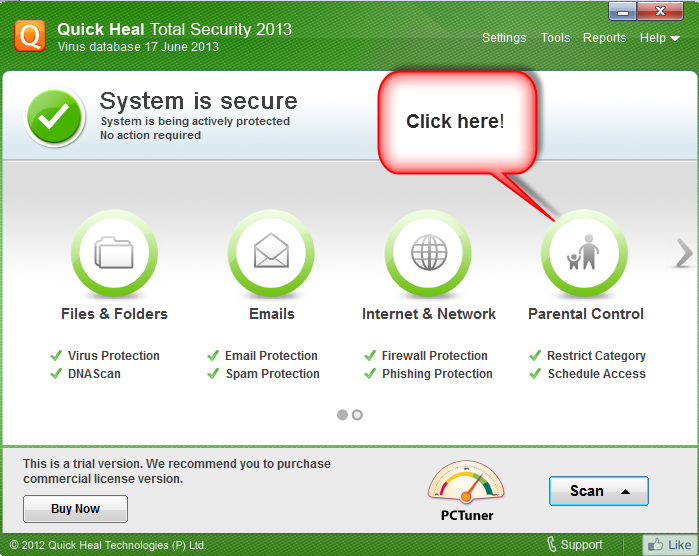
Fig (a)
1. Click “Parental Control”, as shown above. It will take you to a page where you can apply the settings for “All users” or for “Specific Users”, as shown in fig (b.1) and fig (b.2).
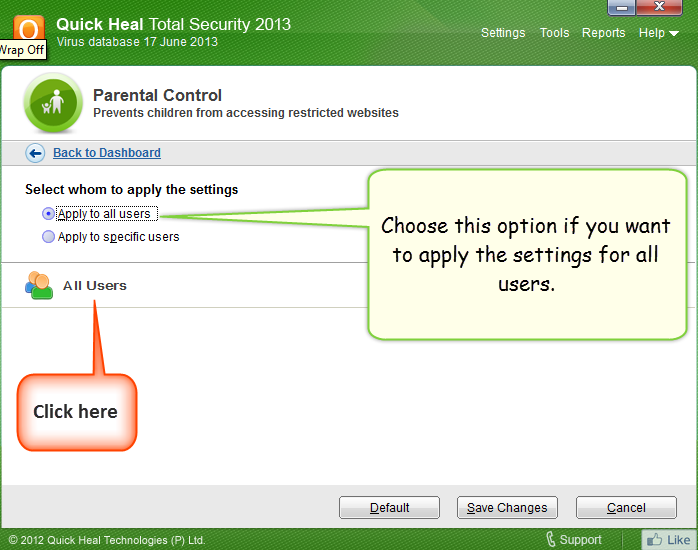
Fig (b.1)
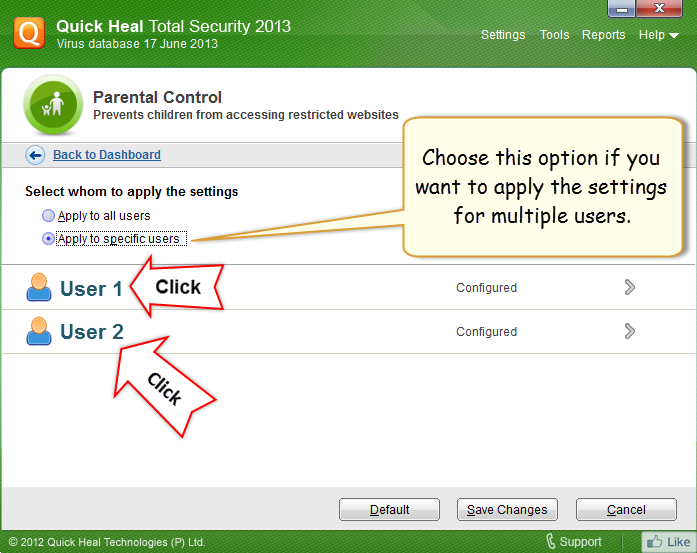
Fig (b.2)
2. Click the desired option to start configuring. A dialog box will appear, as shown in fig (c):
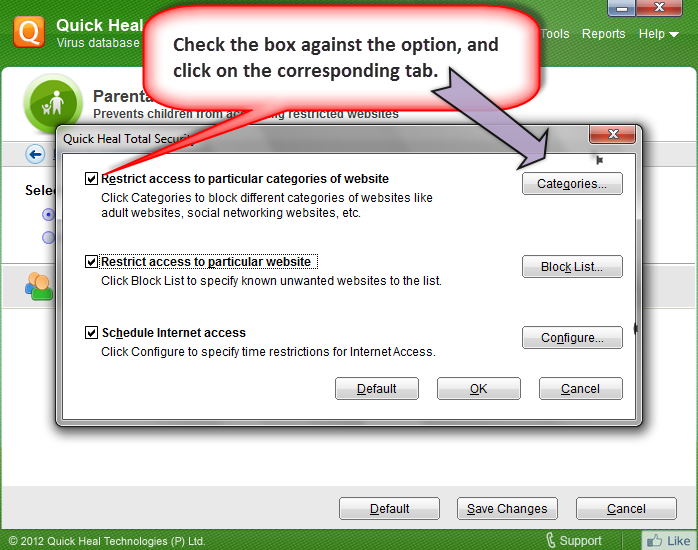
Fig (c)
A. The first option – “Restrict access to particular categories of website”, allows you to block certain categories. Check the box against this option, and click “categories”. It will take you here:

Fig (d)
1. Depending on the category you choose to block, click the “Allow” or “Deny” tab.
2. Once done, click the “OK” tab, and then “Save Changes”.
3. Also, you have the “Exclude” option. For instance, if you have blocked the “Social Networking and Chat” category, but wish to allow access to Facebook, then you can add its domain name (facebook.com) to the “Exclude” list, as shown below:
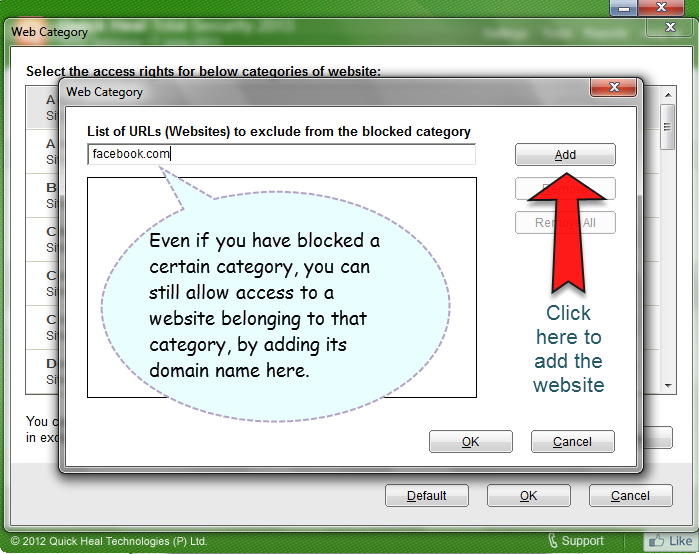
Fig (e)
B. If you go for the option “Restrict access to particular website”, [refer fig (c)], then you can simply block a website by adding its domain name. Check the box against this option, click “Block List”. This will take you here:
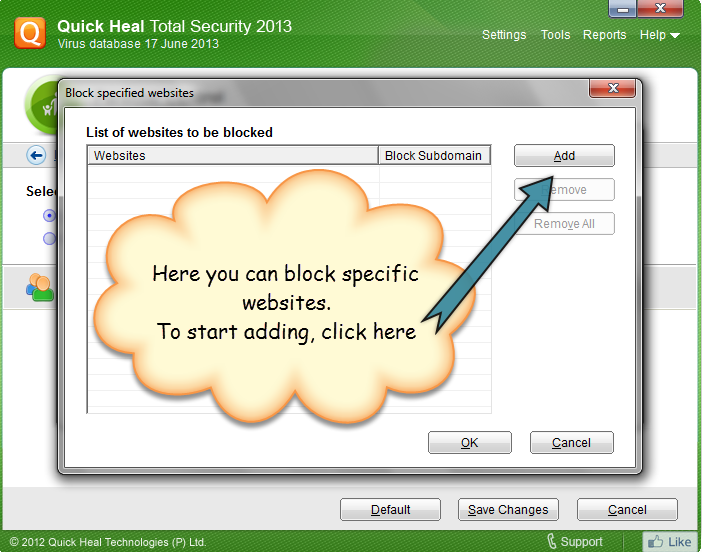
Fig (f)
1. Click the “Add” tab, and you will get a dialog box.

Fig (g)
2. Enter the domain name of the website you wish to block, in the given space. Click “OK” and then “Save Changes”.
3. Quick Heal Parental Control feature also allows you to deny access to subdomains of a website you wish to block.
For example, if you block “google.com” and its subdomains too, then access to all websites containing “google.com” will be denied. For this, simply check the box against “Also block subdomains”, and click “OK” [as shown in fig (g)].
C. The third option “Schedule Internet Access” [refer Fig (C)] allows you to fix a schedule for Internet access. Check the box against this option, and click “Configure”. You will go here:

Fig (h)
1. Click the option “Allow access to the Internet as per the schedule“.
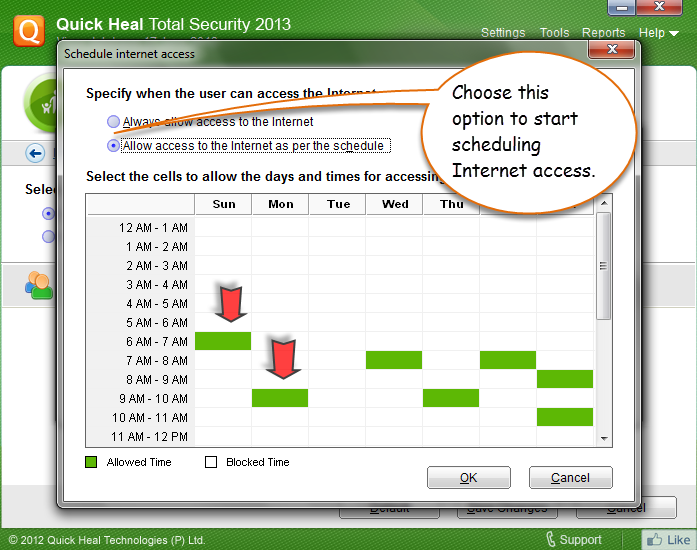
Fig (i)
2. Now, you can fix a day and the time for Internet access. Simply click the white space against the desired time slot and the days. For example, as you see in the screenshot above:
– on Sunday, Internet can be accessed only from 6 am – 7 am.
– on Monday, it can be accessed only from 9 am – 10 am, and so on.
3. Once done, click “OK”, and then “Save Changes”.
Note: For deeper insights into Quick Heal Parental Control and its benefits, you can also follow our microsite .
Quick Heal Total Security 2013, Quick Heal Internet Security 2013, and Quick Heal Total Security for Mac, come with an improved and user-friendly Parental Control feature.